Do you know, that… ?
When editing a component in the assembly, there are several visual signs about providing. This is confirming the corner, blue color of the edited parts of the tree and transparency. And it is this element applies to today's entry.
The default setting is sOlidwOrks Force transparency. Means, that only the edited part is opaque, others are transparent. Unfortunately, this has an impact on performance, because transparency is more than a memory-shaded mode.
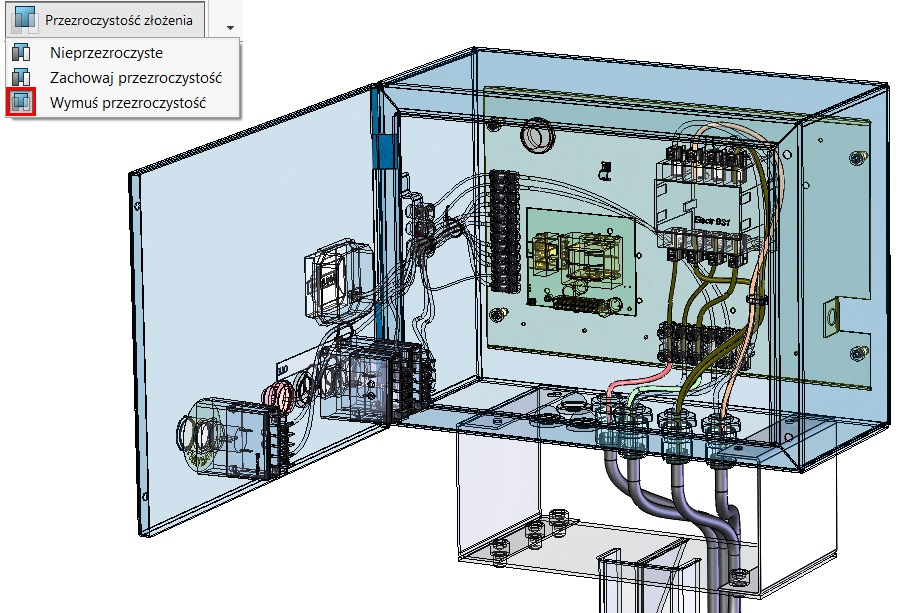
but suppose, the two components in the assembly are displayed as transparent. Then edit another component.
Then after selecting Force transparency only these two components will be in transparent mode.
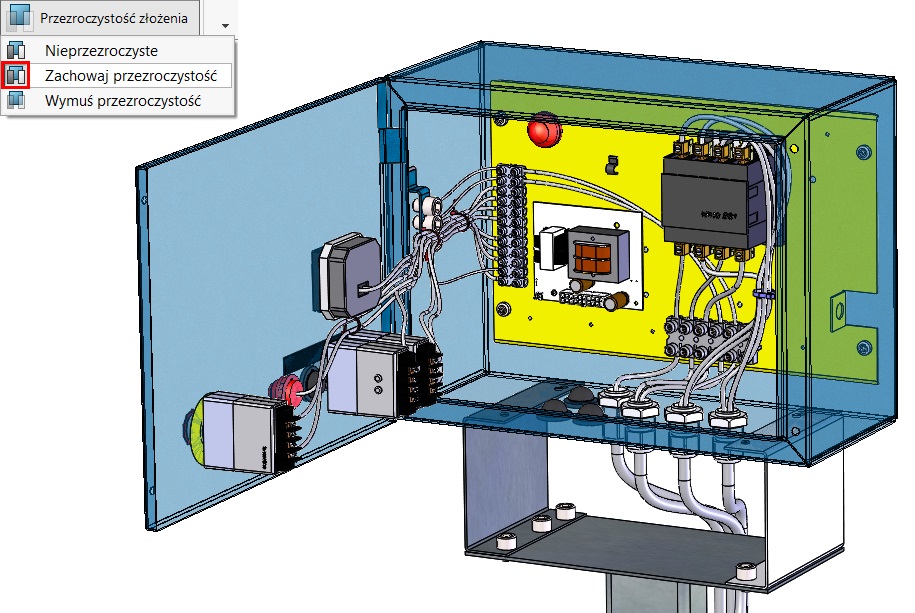
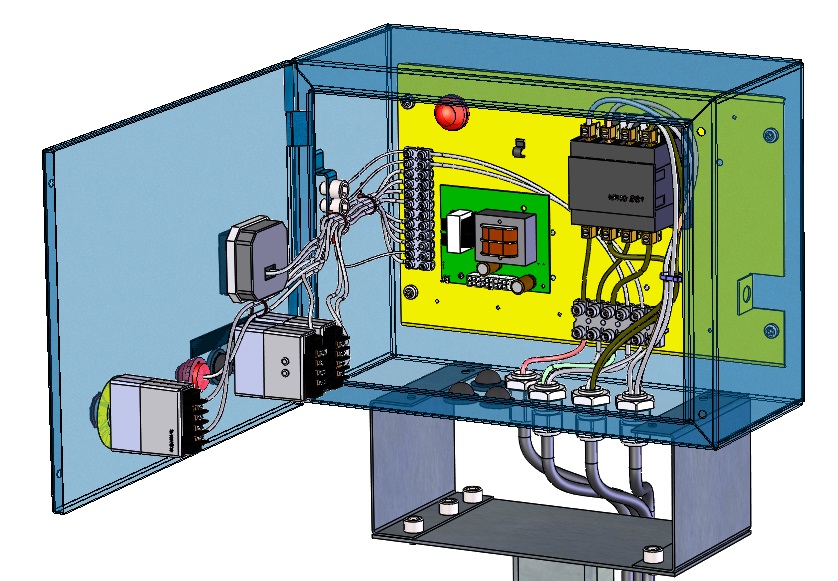
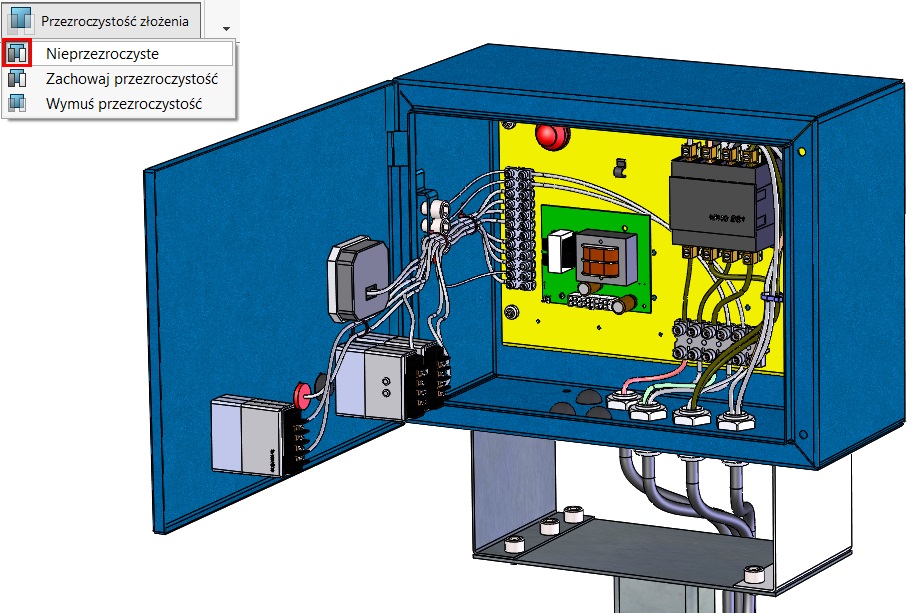
Another possibility is opaque – most personally I use this option. None of the components will not be transparent, more precisely everything you see, it works more efficiently, but some elements simply can not be seen.
In addition, I will turn attention to two important settings. Well, in the options and further Display you can specify the level of transparency – the default is about 90%.
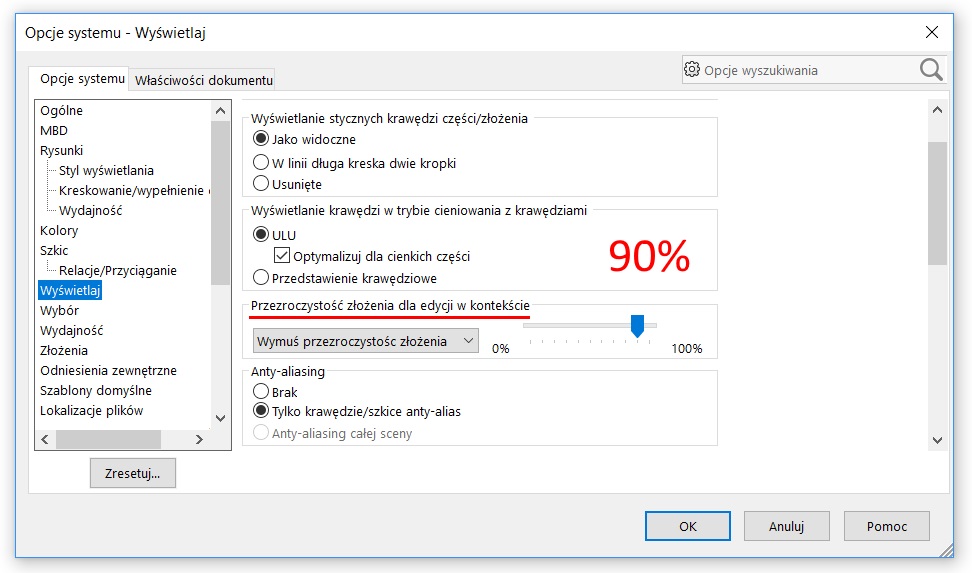
The second important setting is the setting High quality transparency. This option can be found under Efficiency.
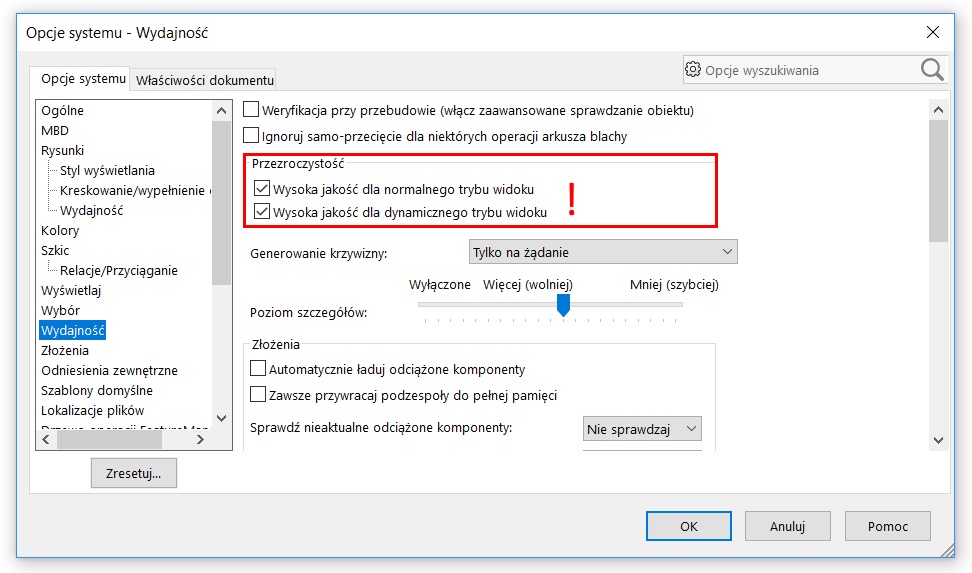
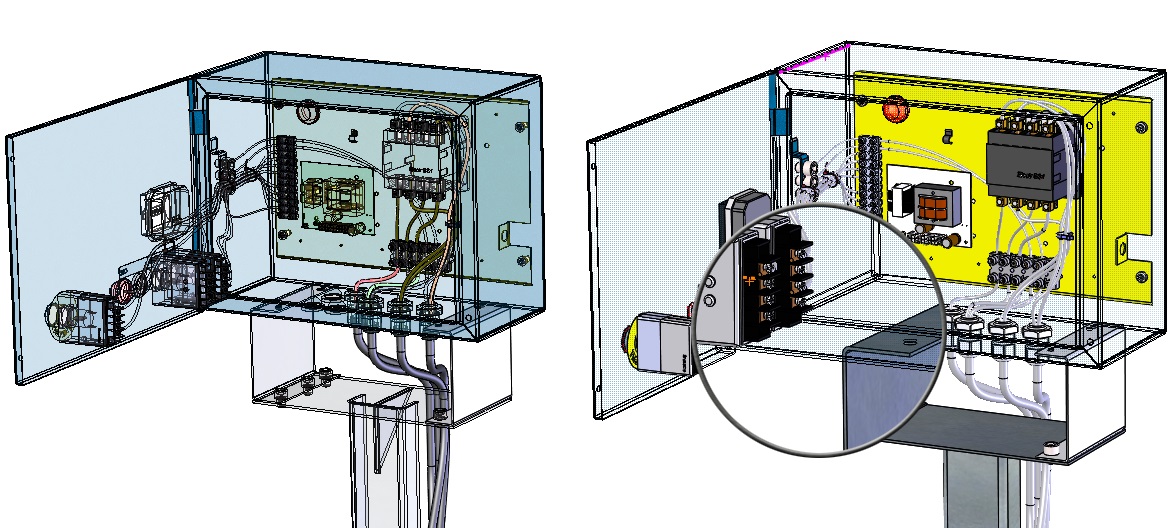
After switching off the high-quality transparent walls (on the left) They will be displayed with uniformly distributed points – pixels (on the right). Visually, it looks worse, but improves performance.
see also, how to choose the elements through the transparent walls: