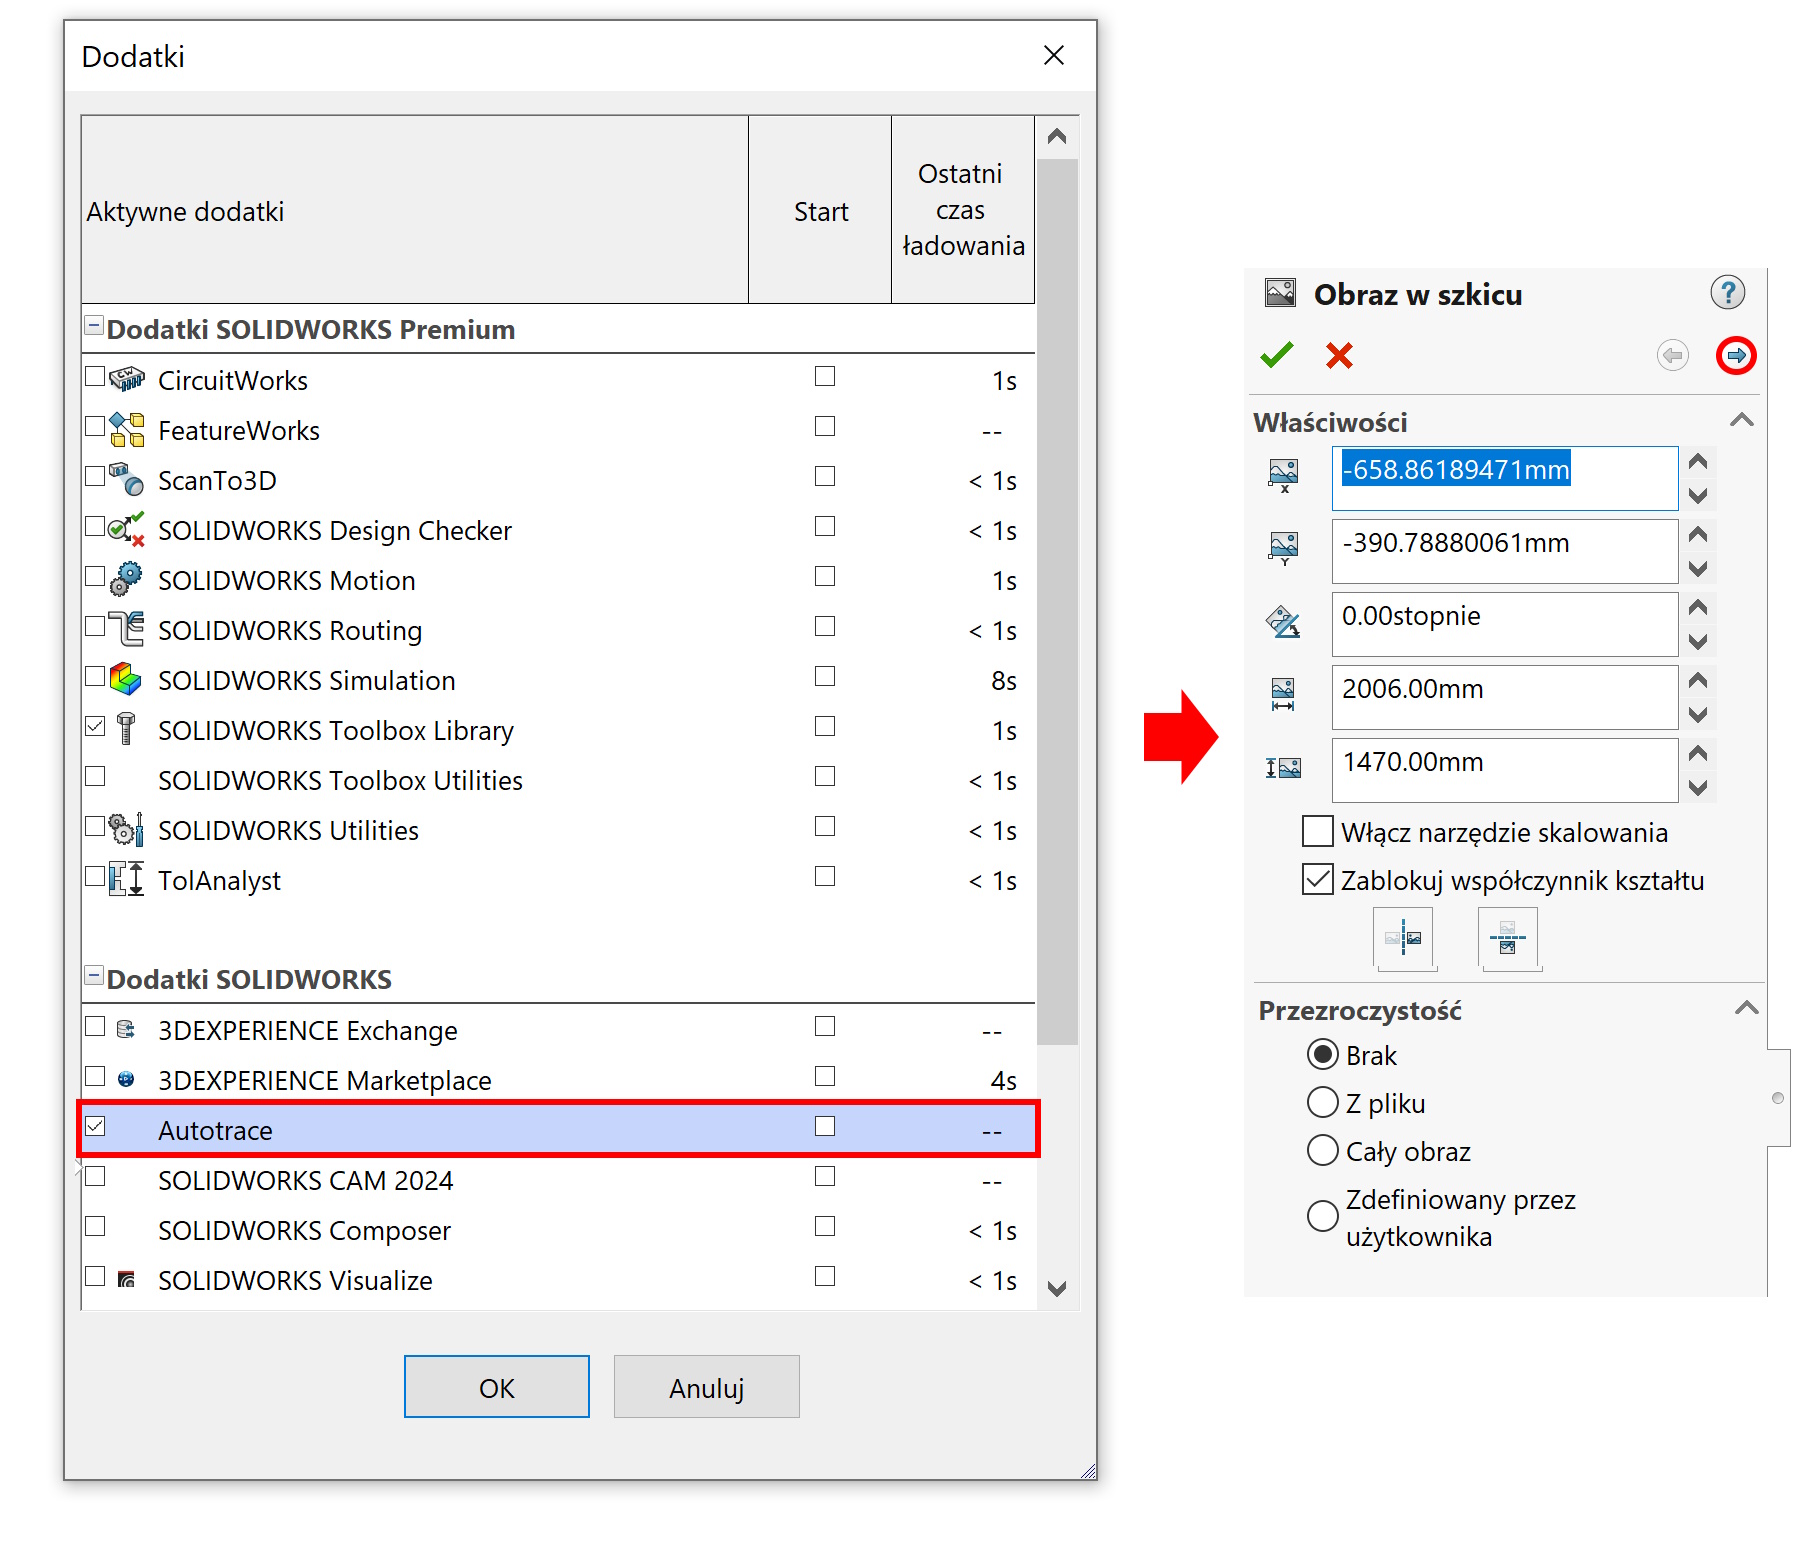
In some areas of CAD design, we can use graphic images. Picture in sketch we insert it in the Tools menu > Sketch tools.
Here are some tips, that can make your work with bitmaps easier.
1. Use as accurate pictures as possible, without a diverse background, no pixels with intermediate shades of gray. Avoid compressed files, because compression worsens the quality! If the border is not clear, this will make it difficult to trace or use the recognition tool.
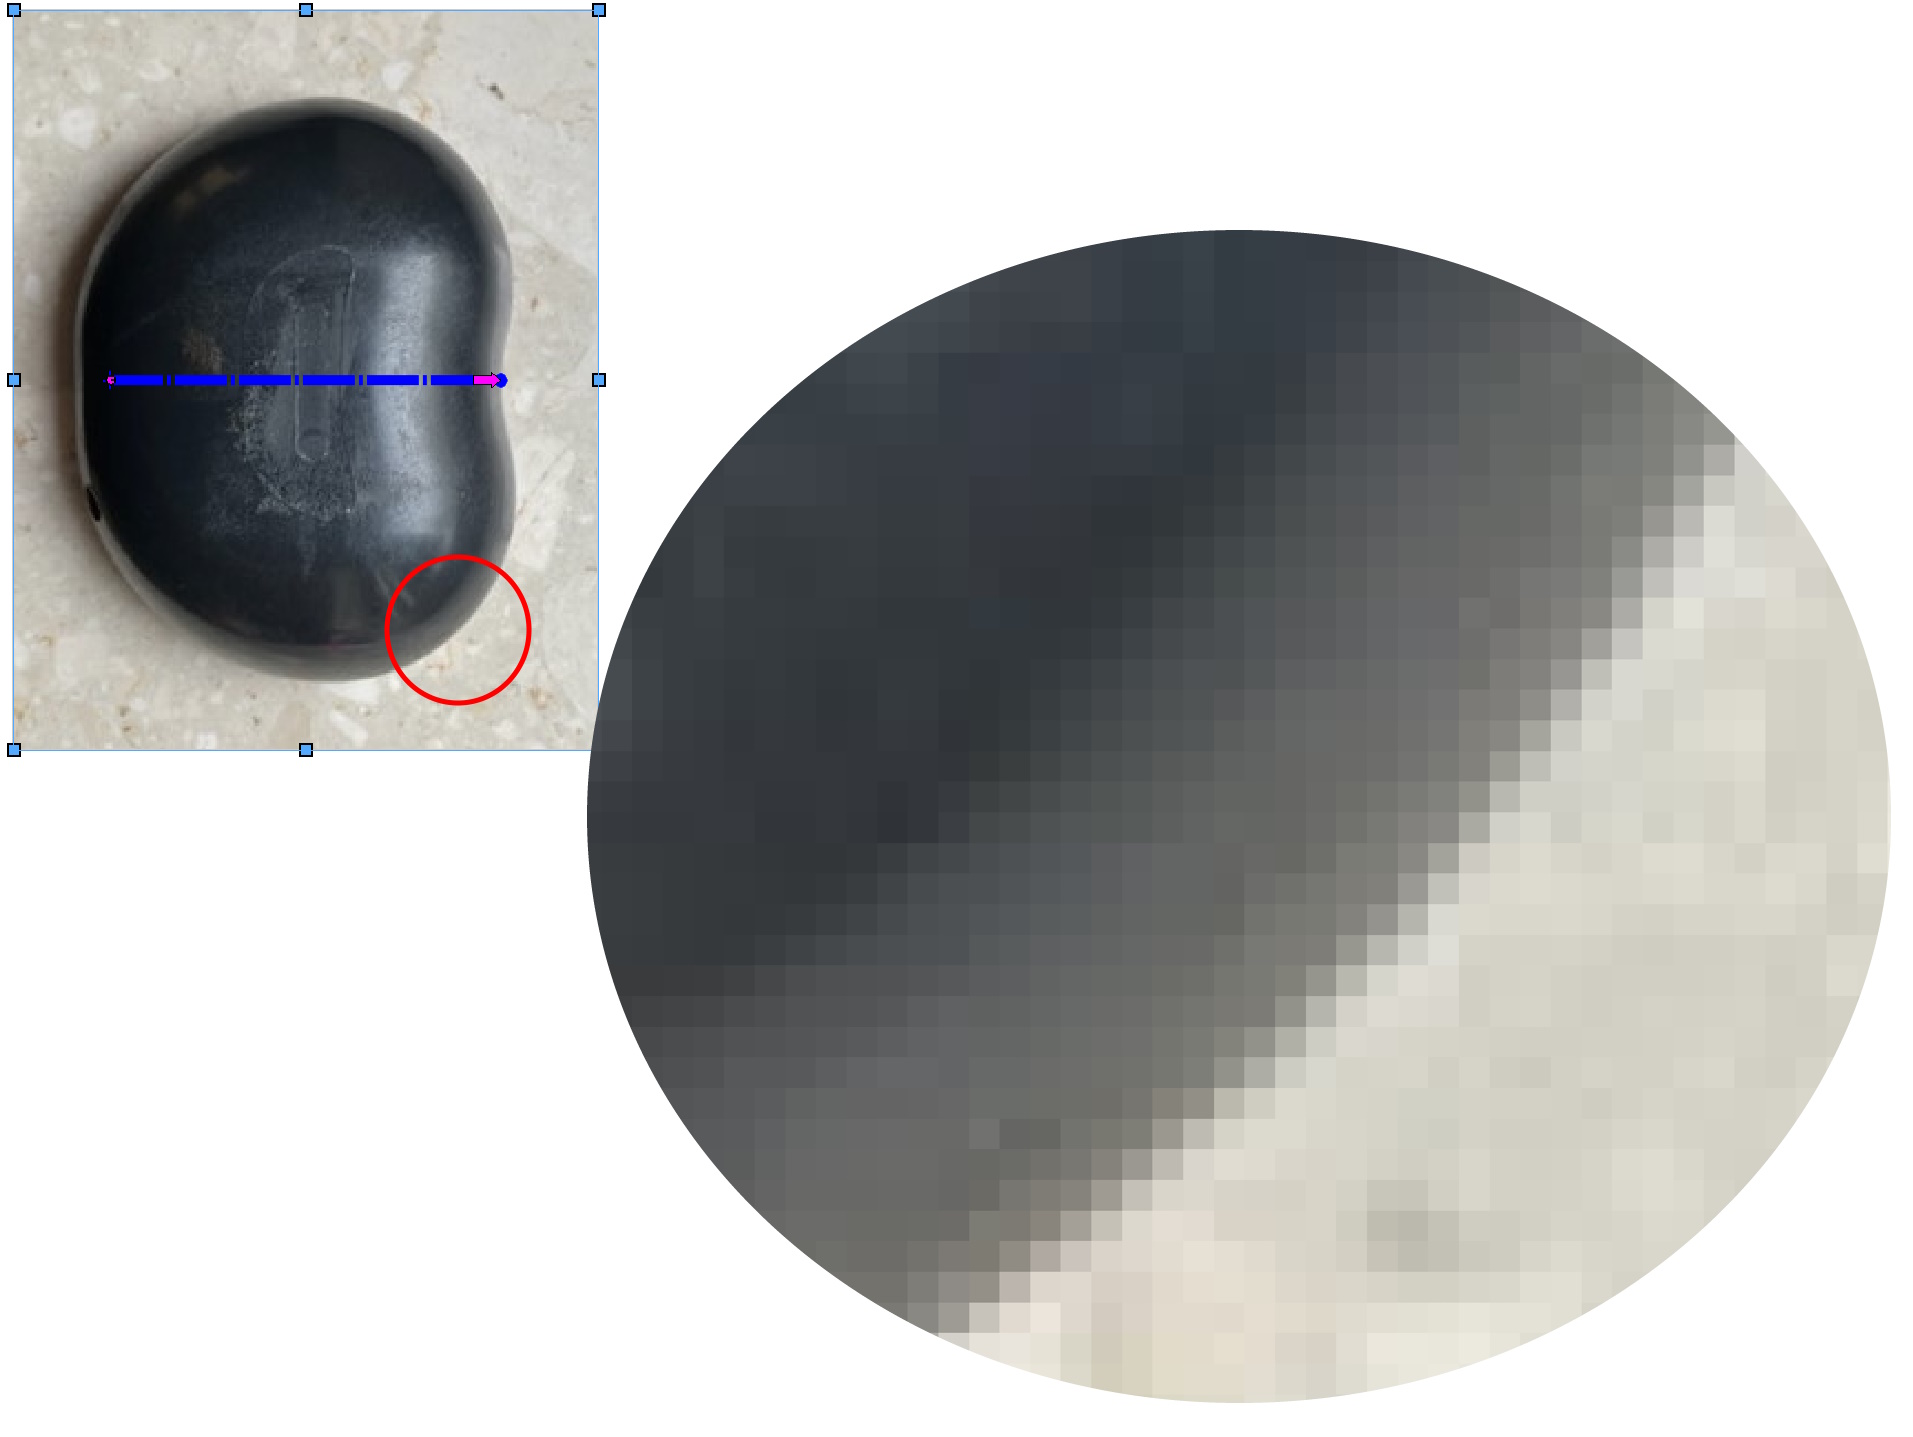

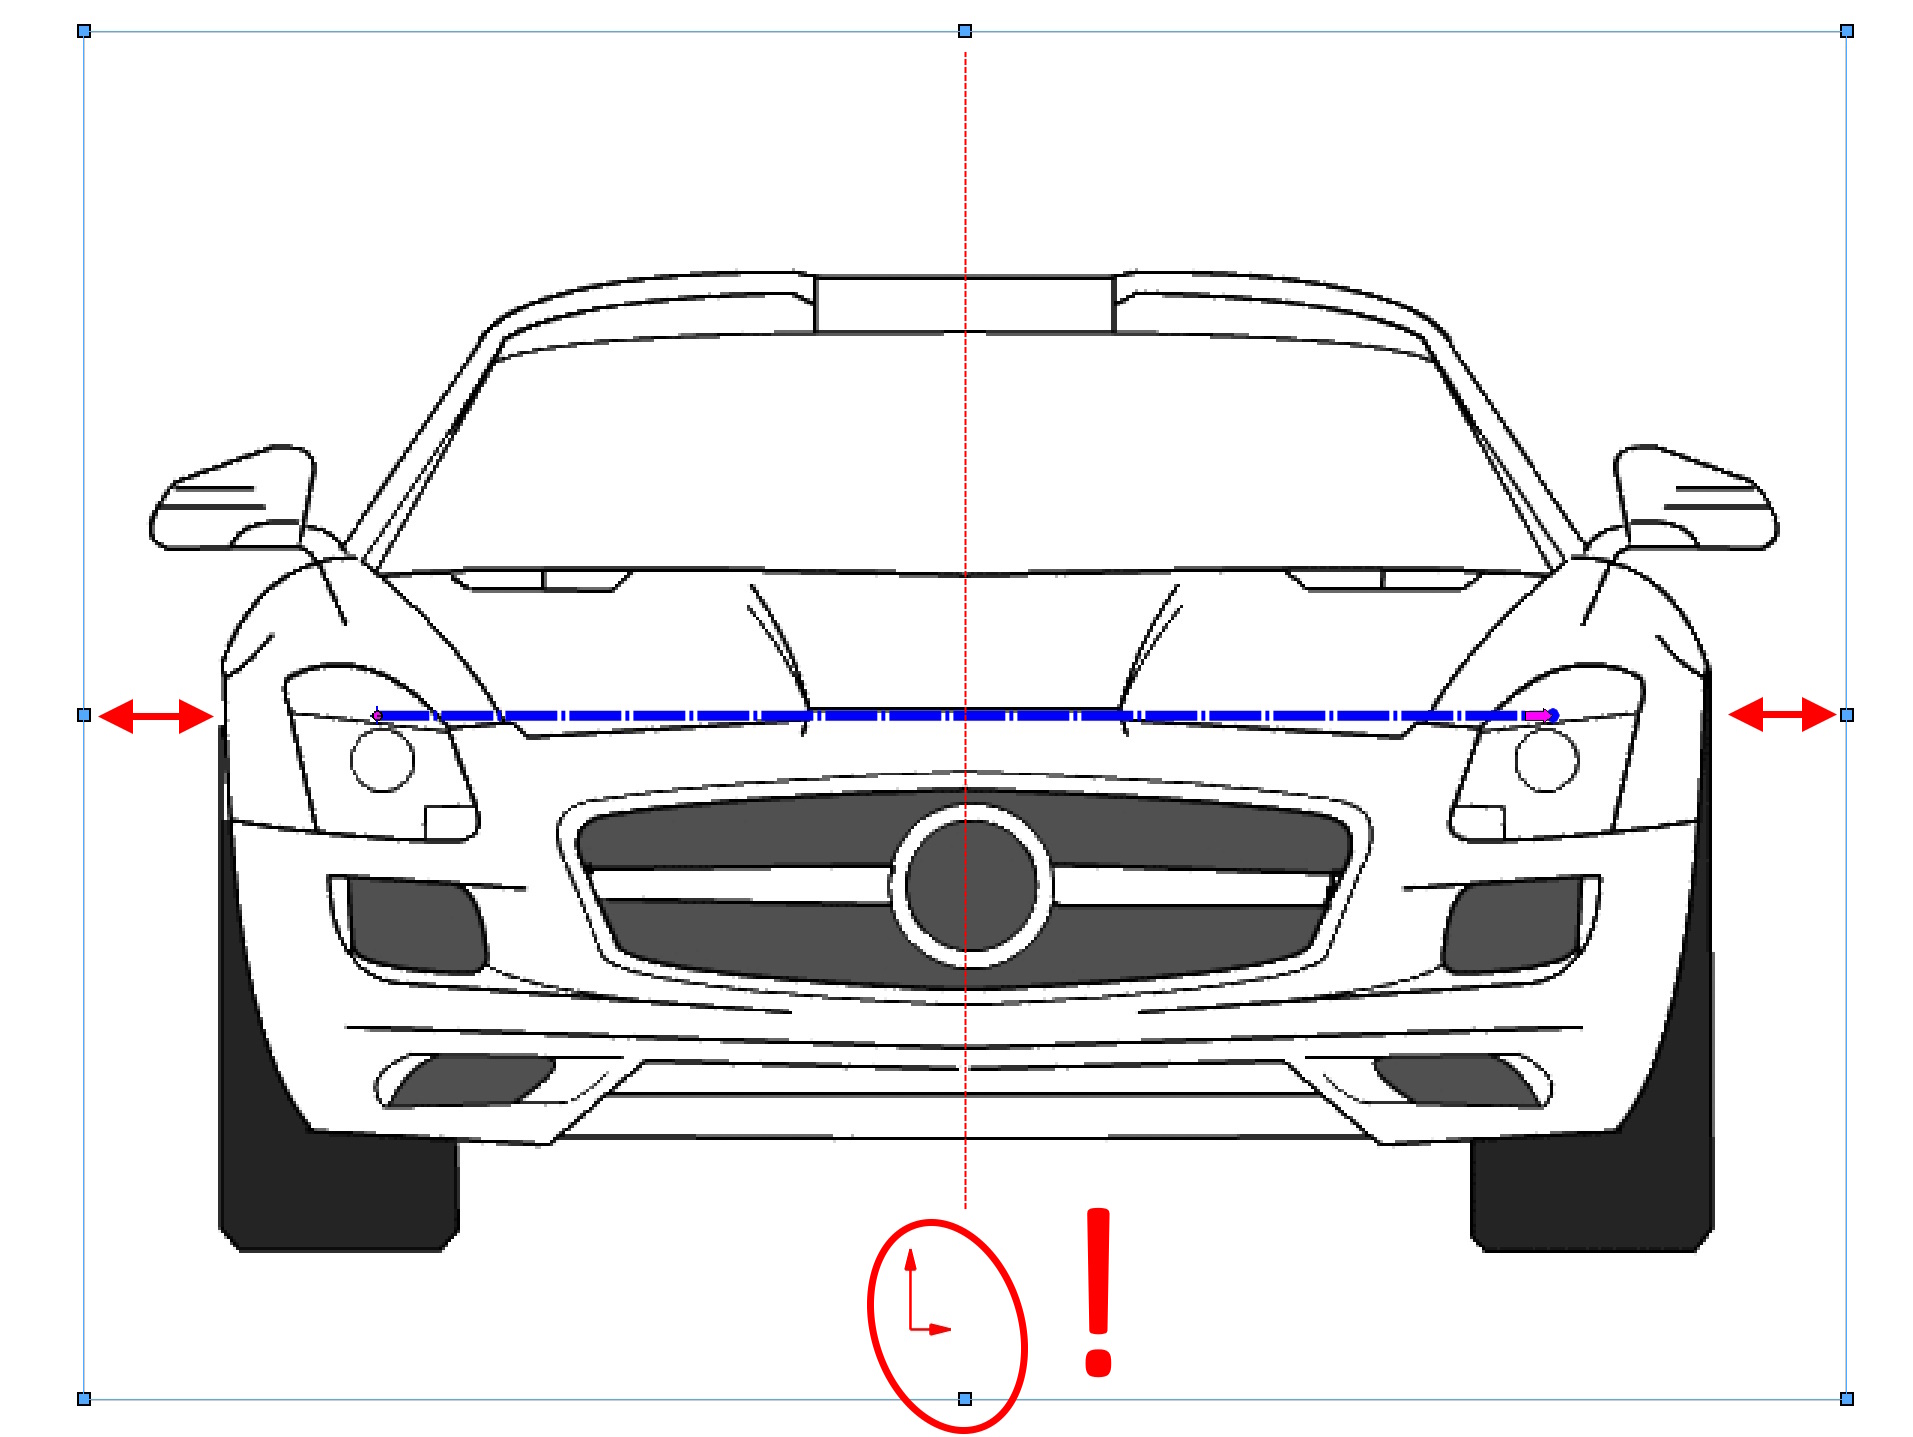
2. Use the natural points of the image to position it properly. The image obviously needs to be scaled, but after each scaling, its position changes. If the graphic is placed symmetrically in relation to the background, use the center points of the image to arrange it correctly.
3. Use image transparency. For this purpose, you can select the entire image or indicate, for example,. selected color with a pipette. Ja w ten sposób często “pozbywam się” białego tła, which will send me existing pieces of 3D geometry. Remember this, o czym pisałem w punkcie pierwszym – różne odcienie tła w zasadzie dyskwalifikuję tę metodę.


4. Always draw in a new sketch, and not in this one, where the image was inserted. Thanks to this approach, you can easily hide the graphic itself, leaving the outlines of the sketch visible. Co prawda jeżeli obraz i kontur będzie w tym samym szkicu – istnieje możliwość wygaszenia samego obrazka. However, for many reasons it is better to break it down into separate sketches in the tree.


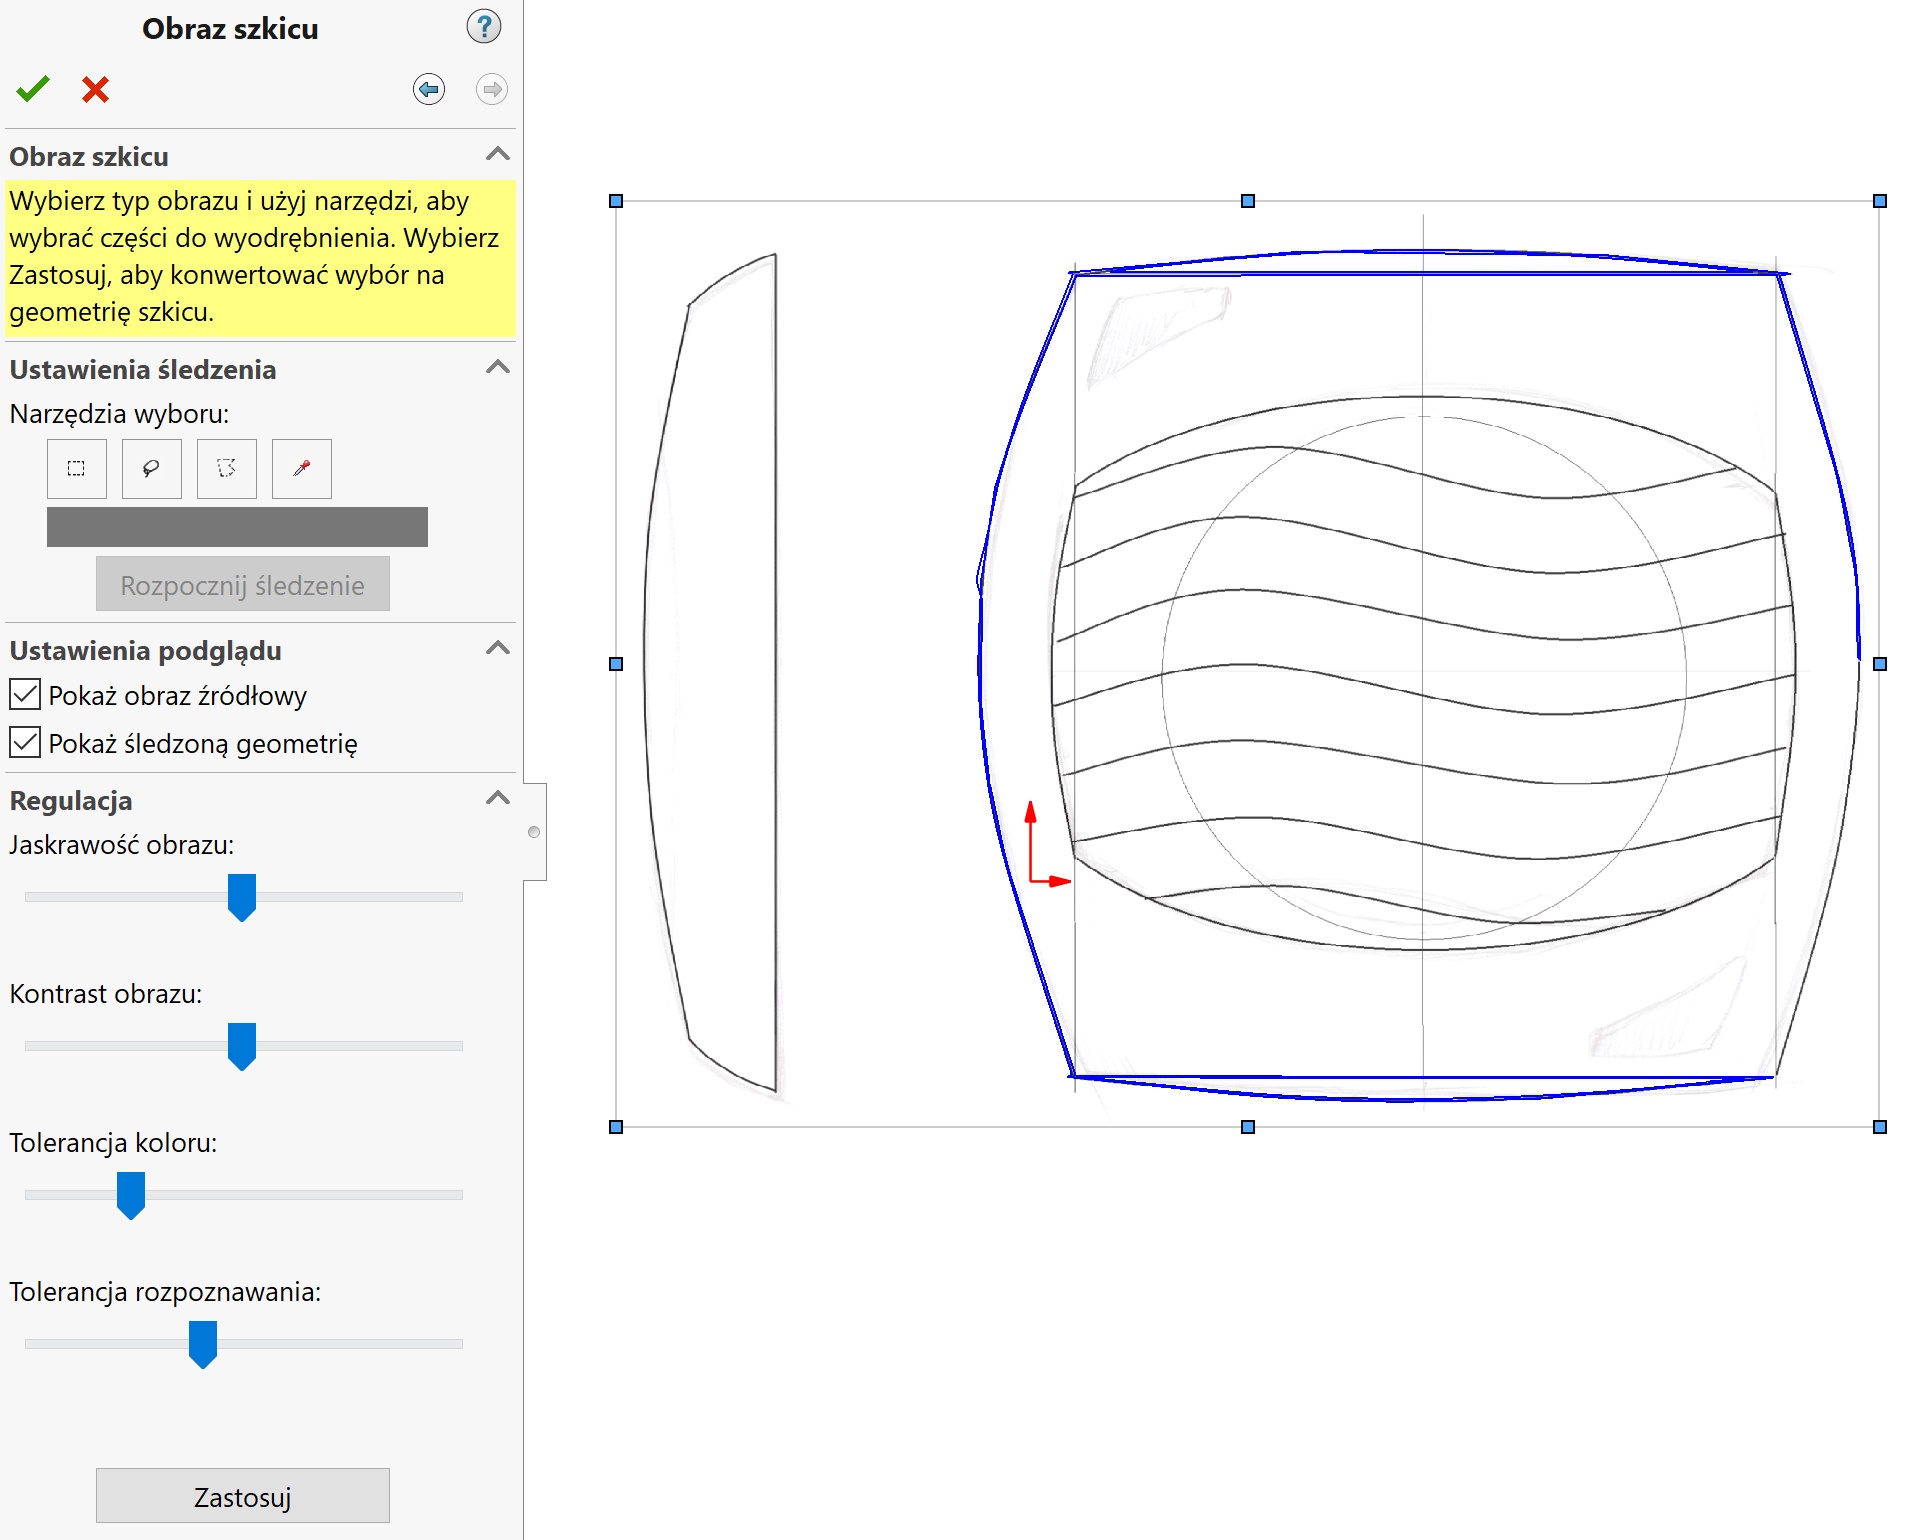
5. The Premium package includes an add-on Autotrace used to recognize contours. In my opinion it doesn't work very well, but in some cases it can help recreate the outlines from the image. There are two conditions, the image must be of really good quality and the shape must be regular. That is, having a clear black outline of a circle on a white background (or in reverse colors) – jest szansa powodzenia.