


3D printing It is now becoming a very convenient and fast method for making prototype models or small lots. Having your own printer users usually have the knowledge of how this process takes place. With the rest of SolidWorks can now directly from within the program (after installing the printer) perform a simulation of print and then print. Available interface is quite extensive.

A little differently it may look, if printing is outsourced to external companies. When printing three-dimensional models should pay attention to several important issues.
- Scaling and a wall thickness
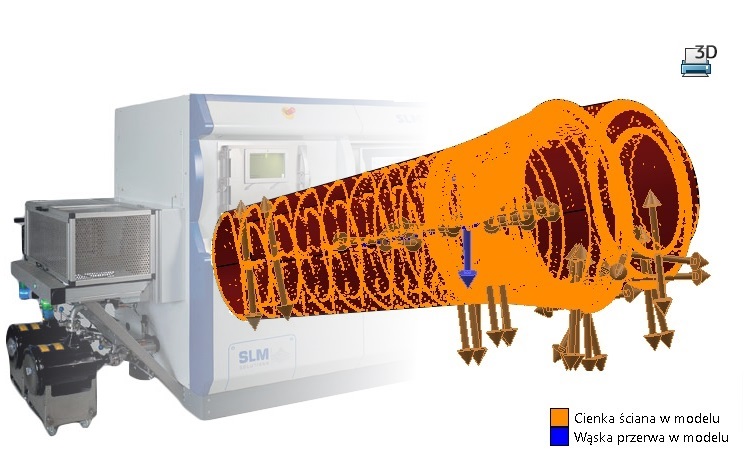
Often they refer to large prints (mechanical, architectural), that have to be scaled. Scaling involves changing the size of the elements, but also the change in wall thickness, assuming, of course,, that the object is not printed in the middle of a full. And here is a common mistake to leave too thin. It is, that the wall thickness shall not be less than 0.3mm, However, this depends on several factors: the printing method (with or without support material), from construction detail (a large area of the object focused, ribbed etc.), the material used for the printing of the same technology. This does not mean, that you can not print a thinner wall, only that it may be too fragile. Generally, 3D printing is growing all the time, So definitely you can not talk about the minimum thickness, but recommended for a particular print. You can now get a smaller thickness than a few years ago.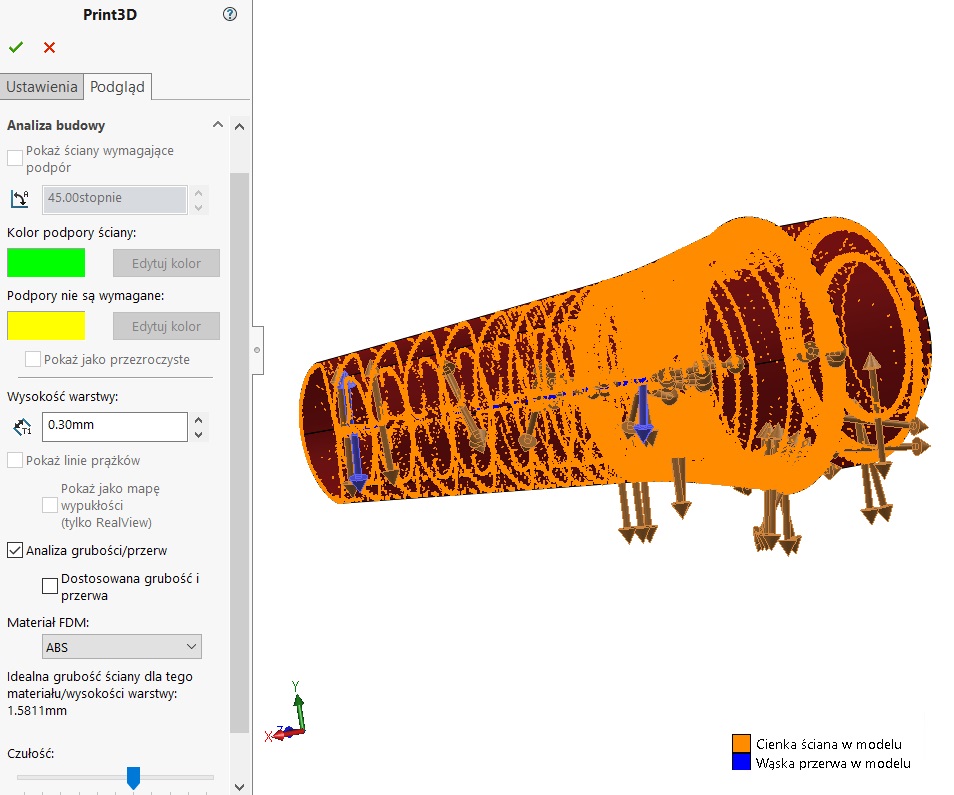

2. Resolution
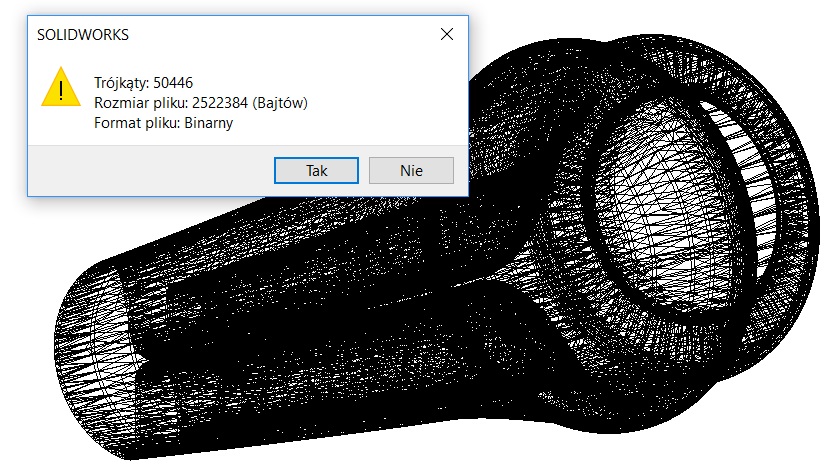
When you save the file to print, należy to zrobić w formacie .*stl – jest to siatka trójkątów. Depending on the structure of the printed model, will be critical resolution stl'a. For example, in sOlidwOrks during recording can be opened Options, where the selected mode between the coarse-grained, small or adjusted. The first two have built-in settings deviations and angle, which directly affect the shape and number of triangles. Minimum in such a situation is to select a mode small. 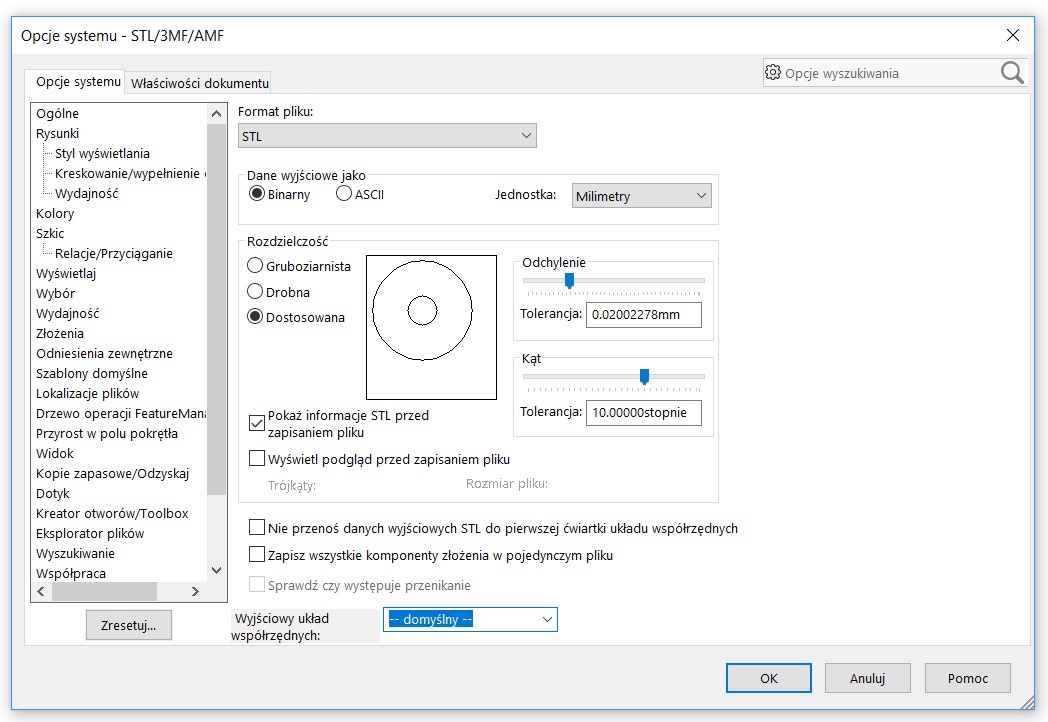

Sometimes, however, even these settings proves to be insufficient. Then mode adjusted move the slider to the right tolerance. But be aware, that dramatically increases file size.
It is good before saving enable Show STL info before saving the file, which will display basic information about the number of triangles and file size.

3. printing assembly
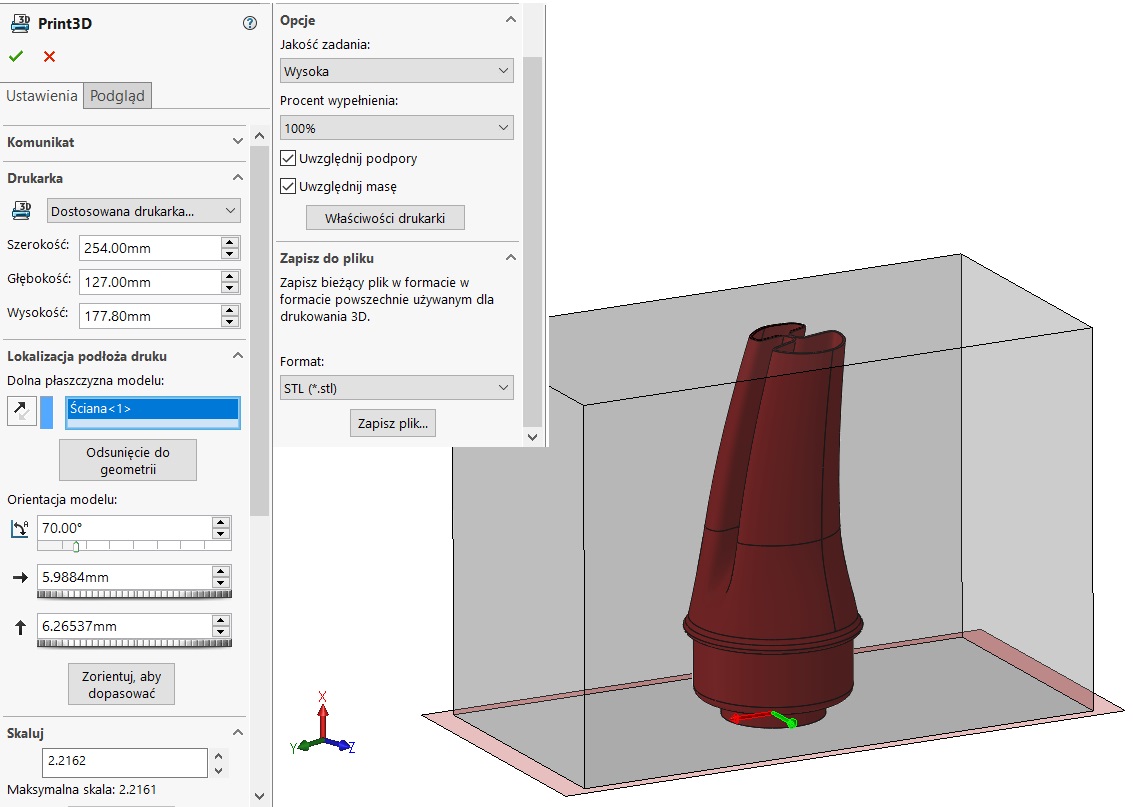
Here, the case looks different. Generally, each file component assembly should be stored separately. Therefore, during recording you can go to option and select the Save all the assembly components in a single file. An alternative way is to save the previous assembly as part of choosing from the drop-down list: save as Part / Part (.*sldprt) and further All components. It is also important to keep gaps between components of 0.3mm.
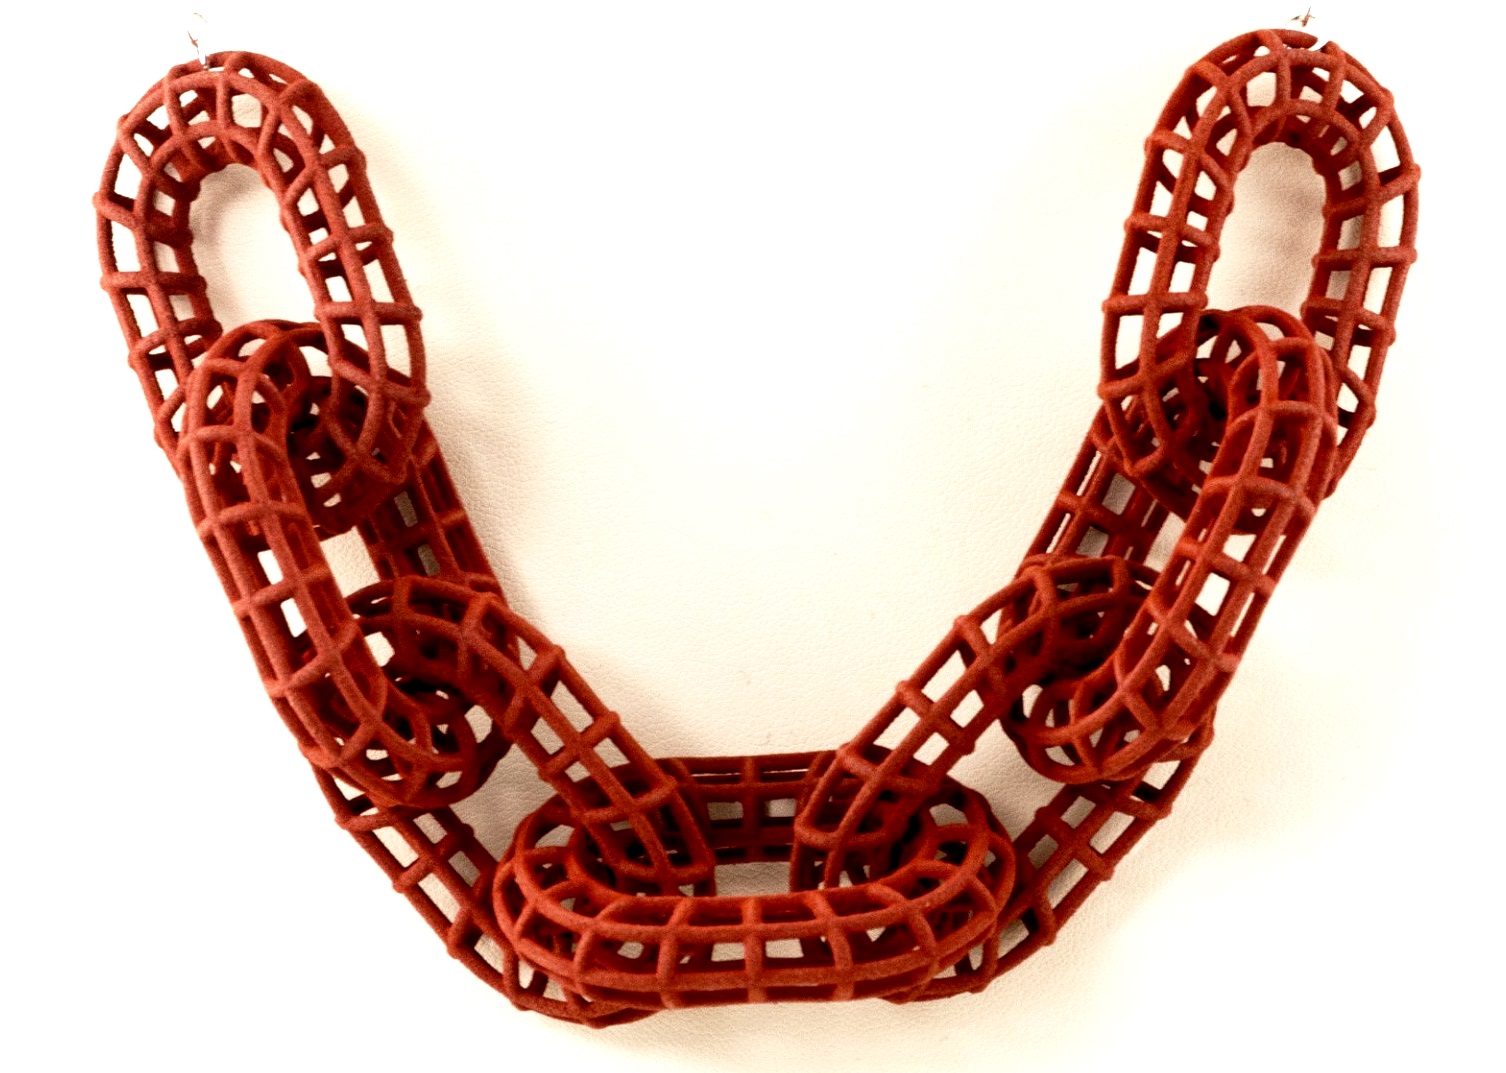
Jeżeli jednak złożenie można fizycznie zmontować z wydrukowanych oddzielnie komponentów – można drukować detalu zupełnie niezależnie (e.g. if they are of different materials or in different colors). But there are situations, where it is impossible to connect the printed elements (e.g. chain link) – wówczas nie ma inne możliwości jak wydrukowanie całości w jednym procesie.

Source: www.phoenixgalleryart.com